SendGrid
Connect SendGrid to Customerscore to send emails from Playbooks and other automated communication features.
How to Connect SendGrid to Customerscore
Step 1: Set Up a Sender Email in SendGrid
If you've already set up a Sender Email in your SendGrid account, you can skip this step. Otherwise, follow the steps below to create one:
- Log in to your SendGrid account
- In the left-hand menu, go to Settings → Sender Authentication
- Click the Create New Sender button
- Fill in the required fields and complete the email address verification process
- Once completed, the verified email address will appear in the Senders table
Step 2: Generate an API Key
- Log in to your SendGrid account
- In the left-hand menu, click Settings, then select API Keys
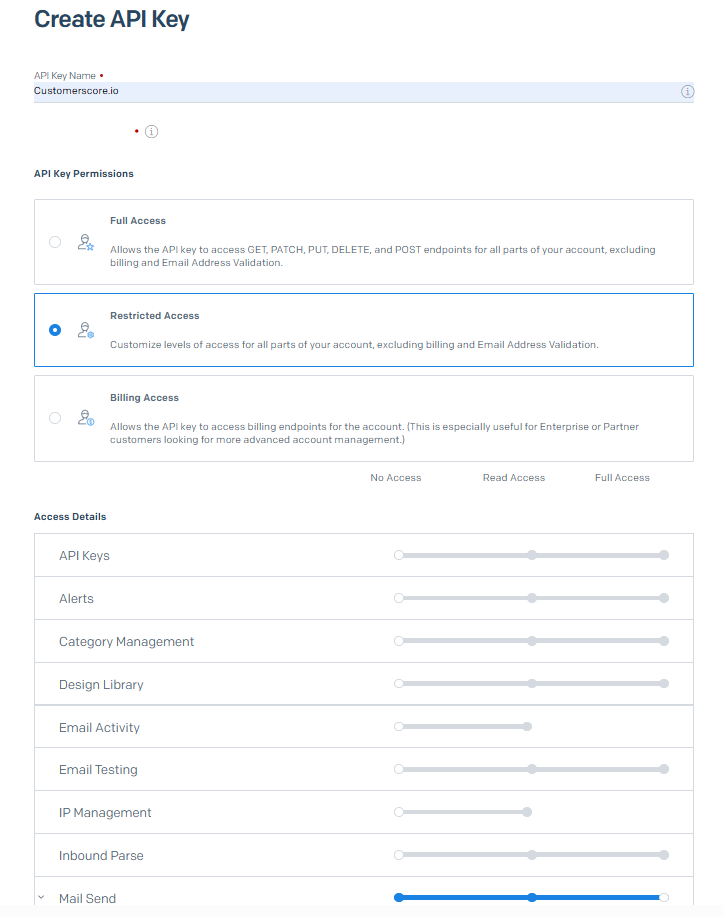
- Click the Create API Key button in the upper right corner
- In the form, set the API Key Name to
Customerscore.io - For permissions, choose Restricted Access, and in the table below, set Mail Send to Full Access
- Click the Create Key button to generate your API key
Once the API key is created, copy this key and return to the Customerscore app to proceed with the next step.
Step 3: Connect in Customerscore
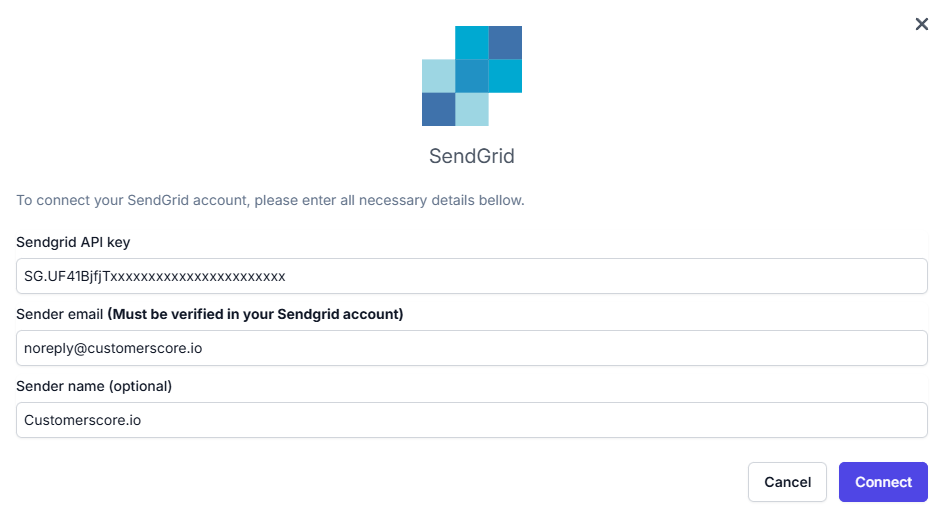
In the Customerscore app, go to Settings → Providers, then click the Connect button on the SendGrid card. In the connection form:
- Enter the API key you generated in the previous step
- Provide the Sender email address that has been verified in your SendGrid account (as described in Step 1)
- Enter a Sender name — this is the name your email recipients will see as the sender
Once all fields are filled in, click the Connect button to complete the integration.
What Happens Next?
Once the setup is complete, your SendGrid account will be successfully connected to the Customerscore app. This email provider will be used to send all emails configured within your Playbooks and other automated communication features in the app.